5 Steps to backup your laptop with Veeam Availability Suite 9.5
 With the release of Veeam Availability Suite 9.5 in November 2016, a number of new exiting features were announced including:
- Enterprise scalability
- Advanced ReFS integration
- FULL integration with Microsoft 2016 Data Center Technologies
- Cloud Restore for ANY Veeam Backup
- Advanced integration with Nimble Storage
- Self-service backup and restore capabilities for VMware vCloud Director
One of the cool features that I like, but might not be immediately obvious is that you are now able to backup any laptop or desktop to the Veeam backup and replication server repository. To do this, you’ll need Veeam Availability Suite 9.5 and the free Veeam endpoint backup. Follow the 5 simple steps described below to achieve this.
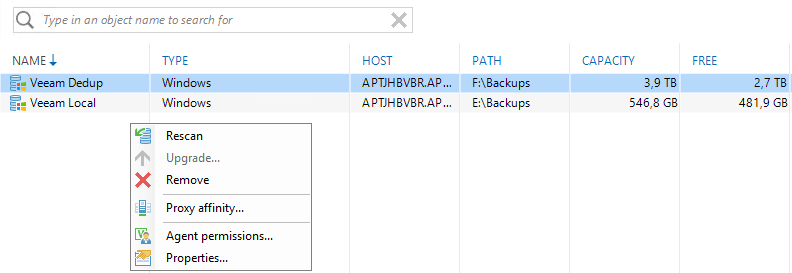
Step 1: Create your Veeam backup repository and give the user access to the repository. Right click on the repository and select the ‘Agent permissions…‘ option from the popup menu.
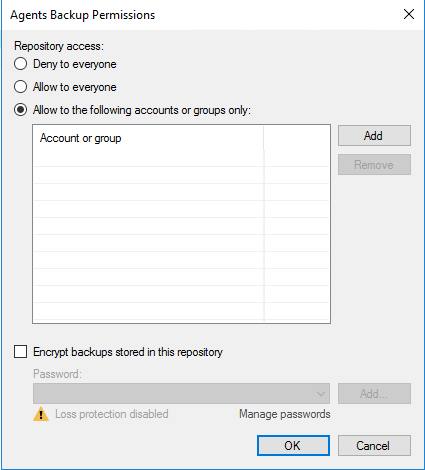
Step 2: Add the users that should have access to the Veeam repository.
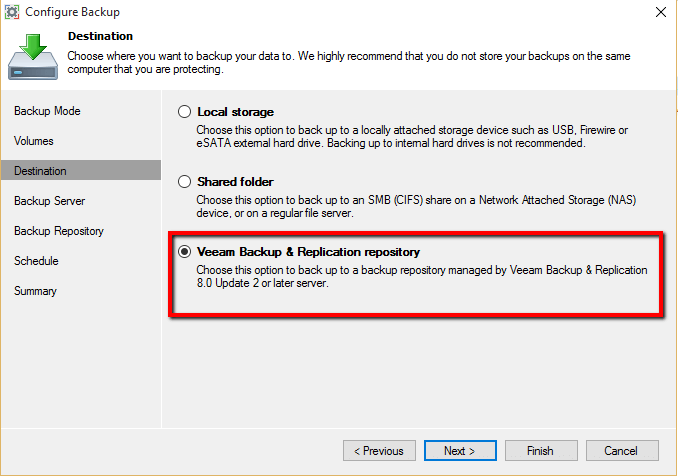
Step 3: Start the Veeam endpoint client on the machine that needs to be backed up, select ‘Configure Backup‘ and then the ‘Destination‘ tab. Select the ‘Veeam Backup & Replication repository‘ option and click the Next button.
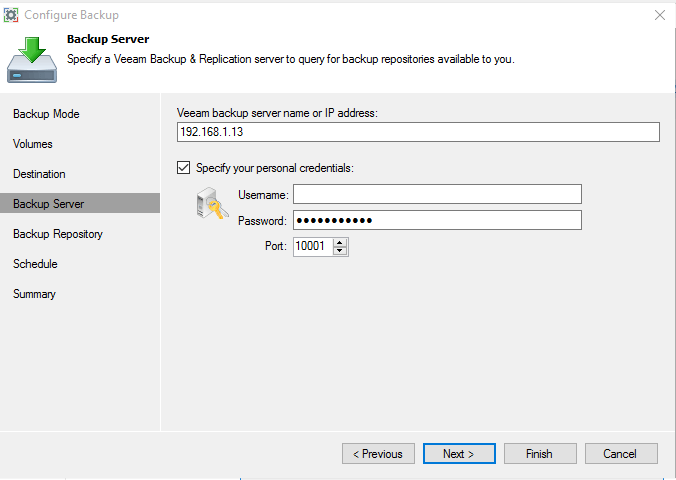
Step 4: On the ‘Backup Server‘ tab, enter your Veeam backup server name or IP address and click the Next button.
Step 5: On the ‘Backup Repository‘ tab, select the ‘Backup repository‘ from the drop down list. This should be the Veeam backup repository where you set access permission for users in Step 2.

That’s it! You will now be able to backup your laptop or desktop.
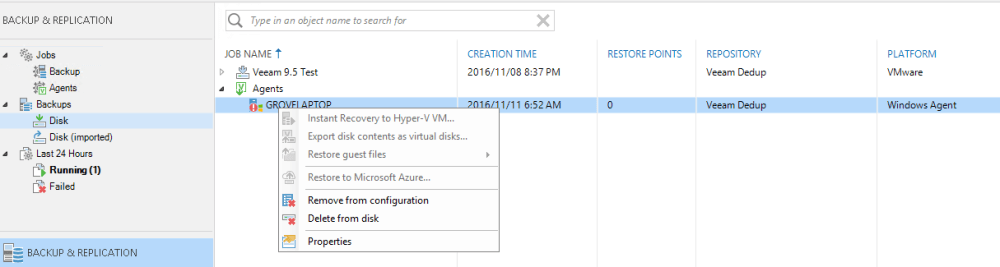
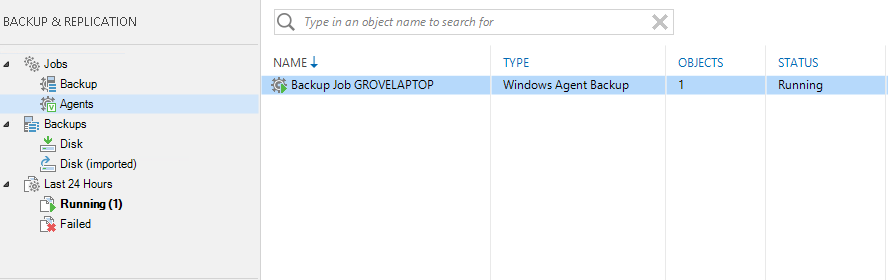
To check the status of a backup, go to Jobs / Agents on your Veeam backup server.
Once you have done the backup, right click on the machine name to display the popup menu. Restore options include Instant Recovery to Hyper-V VM, Restore guest files and Restore to Microsoft Azure.